


So I was getting worried that I’ve now got a lot of plague marines for my Chaos Marines army, and of all the custom marines I made (non-Forgeworld torso ones) might be starting to look a little too similar to one another. I also was looking at other plague marines on the net, and seeing on the GW models that some of them have parts that are in full decay. A lot of my plagues have pallid flesh where flesh is exposed, but not a lot of actual “rot”, especially on the face area – for instance, they still looked “human”, even though they were slightly decayed. I was thinking, need to get some plagues that are in full-blown decay mode. So I decided to try to get creative…
The idea was to create a cracked open space marine helmet where there was some battle damage or something, and have not a face behind the corrreded away or damaged area, but a rotten, decayed skull face. So the first thing I did was to pick a Chaos Marine helmet that I was not likely to use as a regular helmet (conservation of parts you know!) and carve/drill away a section, and place a skull bit inside the carved away area. Easier said than done! Then I drilled away half the helmet with a large-ish drill bit. First shot of this is above.

Another shot where you can see the Chaos Space Marine helmet with the big drilled hole in it. This is where the skull bit (carved down) will rest.

Another shot, next to my hobby knife, maybe a bit more clear of a picture.

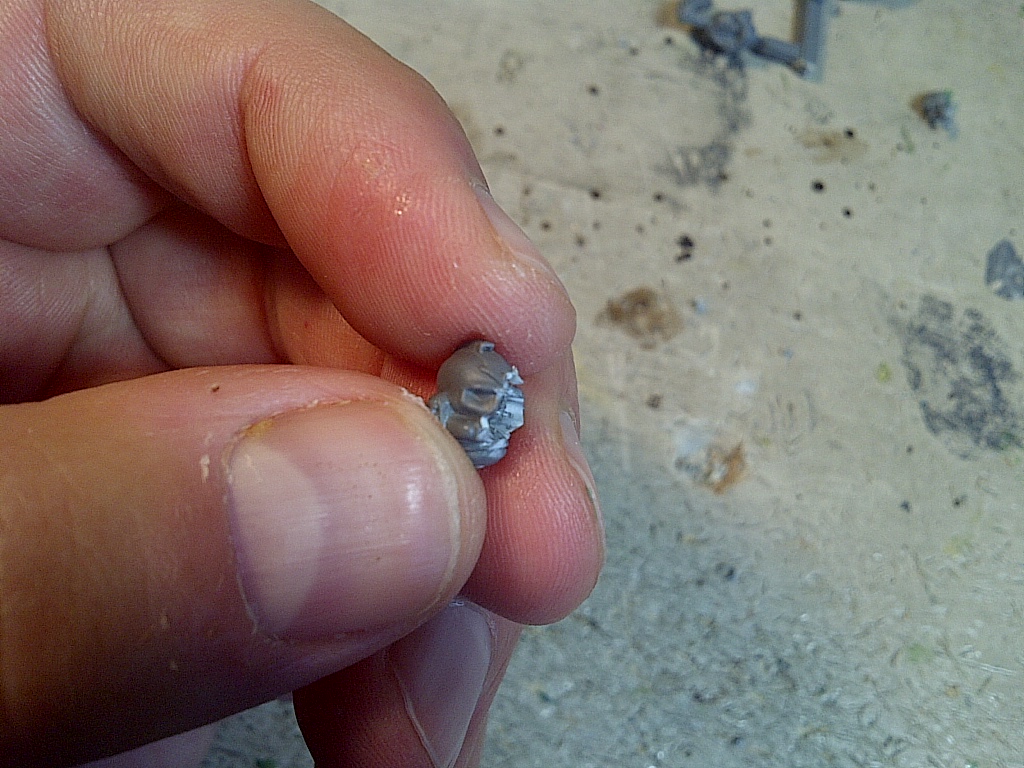
So here comes the fun part. Once I was happy with the size of the hole (I was envisioning about 1/2 of the front face plate to be gone, say on one half of the helmet, and the other half of the helmet would be exposed skull), I found a skull bit in my bits box that I could use to finish up the other half. I actually used a skull from one of the Rhino spiky-bit trophy rack thingies (not exactly sure what you call them, but the rows of spikes that adorn Chaos vehicles). I took that skull and cut it off the rack, then looking at the hole I made in the CSM helmet, I tried my best to match the material removal on the skull such that it would fit. I took my time with this and did several iterations – the worst thing you could do here is get too aggressive and take off too much skull and then have a bit that is too small to fit the chamber you made for it. So I carved a little bit of skull away at a time, taking special care to try to match the contours of the chamber in the helmet with the curves I’d need on the removed side of the skull. After the fit was good, I glued the skull bit in place, see above.

Another shot of the skull bit glued in place, a little bit more of a front-on view.

Then, go ahead and glue it to your favorite to-be plague marine model! This skull head found it’s home on a plague marine body I started working on recently; I wanted this plague to be really necrotic and falling apart and nasty. His body had a cavity drilled out of it and some rotten bloated growth coming out of the cavities, with some tentacly fun coming out of some cracks in the armor as well.

Another shot of the skull head attached to the body. Another thing I typically do on my plagues is to use some greens stuff along with some creative drilling to make the shoulder pads look decayed and pustulent; this is particularly effective on shoulder pads as you see here as these are typically big flat areas that are crying out for conversion and corrosion.

A little bit closer up on the front of this guy. The tentacle coming out of his right shoulder came out pretty well. The bulbous blob on his right side of his torso will be a lumpen rotten flesh protrusion from his armor, when painted.

Another shot, closeup of the face. You can see where I put some green stuff in there to fill the gap between the skull bit and the helmet. The idea here is that it creates visual cohesion between the helm and the skull as well as gives me the painter an opportunity to have some painted decayed flesh at the intersection of the helmet and skull – you could see in your mind’s eye that the flesh underneath the helm might have been more protected than the unfortunate patch of flesh right where the battle-damage occurred.

Side view.

Another side view.
Well, that’s it for this conversion. Hope you enjoyed the brief tutorial. Plague Marines are so much fun to convert and build, I have a hard time putting down these projects, even though I have generally enough plagues at this point (although I do need more bolter plagues and I still don’t have any with flamers….) So the converting goes on!


Ok, pretty awesome!
Heh thanks. I sorta feel like an addict creating so many dang plague marines!